
Step-by-step guide
Find generated files in GuroAssist
Files workspace keeps generated outputs, saved folder details, and local open actions together so teachers can find files without guessing.
Teacher goal
How do I find and review generated files after they are created?
Use this guide when this is the task in front of you. Stop if the selected class, learner, role, school year, file, or output does not match.
In-app path
- Files
Get ready
Check the starting point
These are the minimum conditions for the workflow to make sense.
Before you start
Estimated time: About 5–10 minutes
- A generated or saved file from a supported GuroAssist workflow
- The local folder or drive where the file should remain
- Time to open the actual file before using or sharing it
You should see
Selecting a generated file reveals its local status, format, file name, and the available Open or Show in folder actions.
Steps
Complete the task in order
Review choice points, save or preview behavior, and any stop condition before continuing.
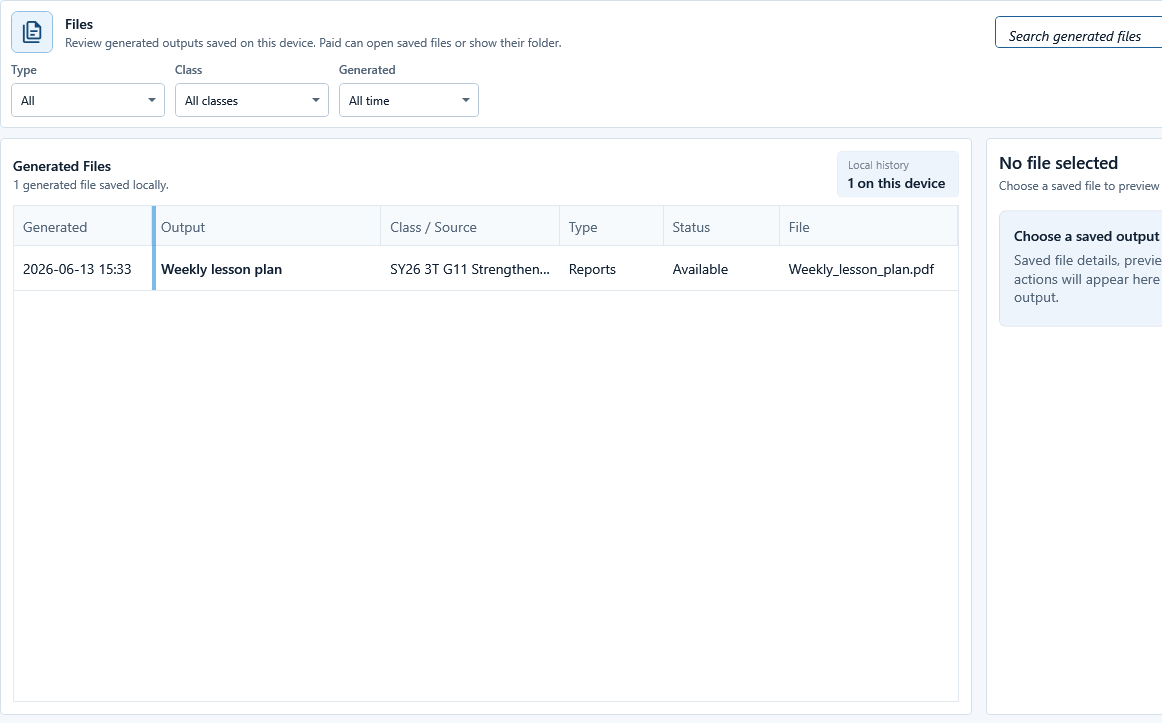 View full size
Sample data only. Files is the device-local index for generated outputs. Captured July 12, 2026. Step 1
Open Files and let the history load
Choose Files in the main navigation. Confirm the workspace shows local generated-output history for this device before searching or filtering.
Expected result: Files is the device-local index for generated outputs.
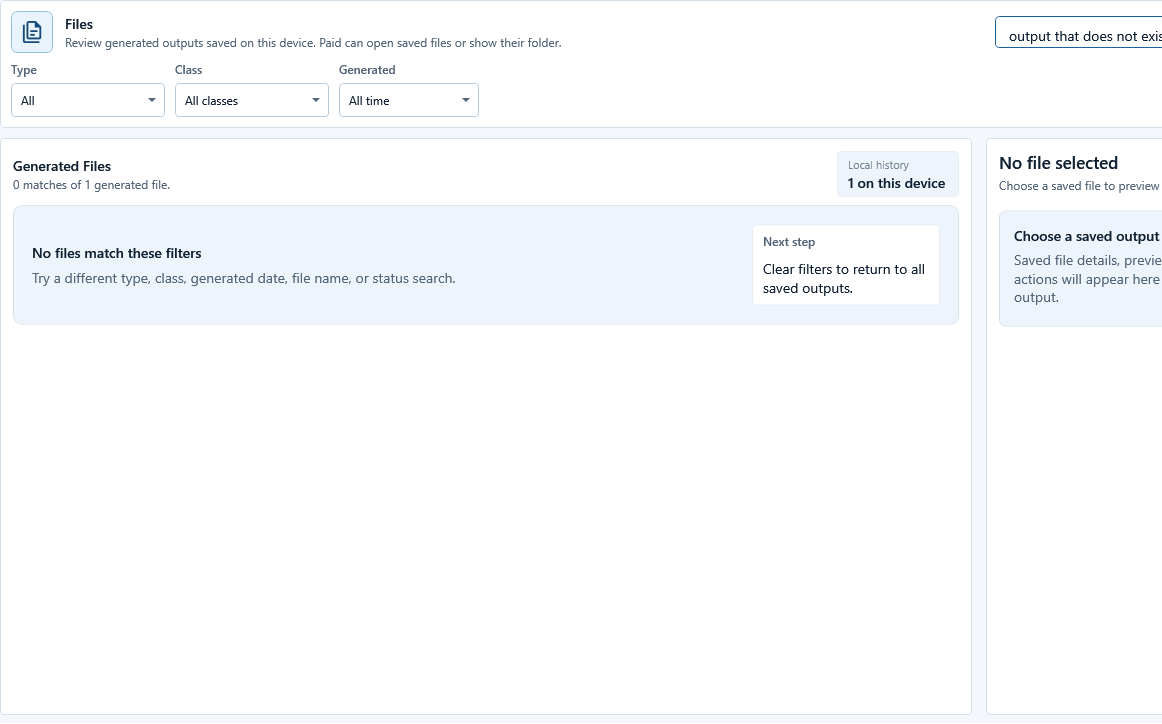 View full size
Sample data only. Search and filters narrow the local history before selection. Captured July 12, 2026. Step 2
Search and filter without assuming a missing file was deleted
Use the search box and available type, source, class, or date filters. Clear filters when nothing appears, because an empty filtered result is not proof that the local file is gone.
Expected result: Search and filters narrow the local history before selection.
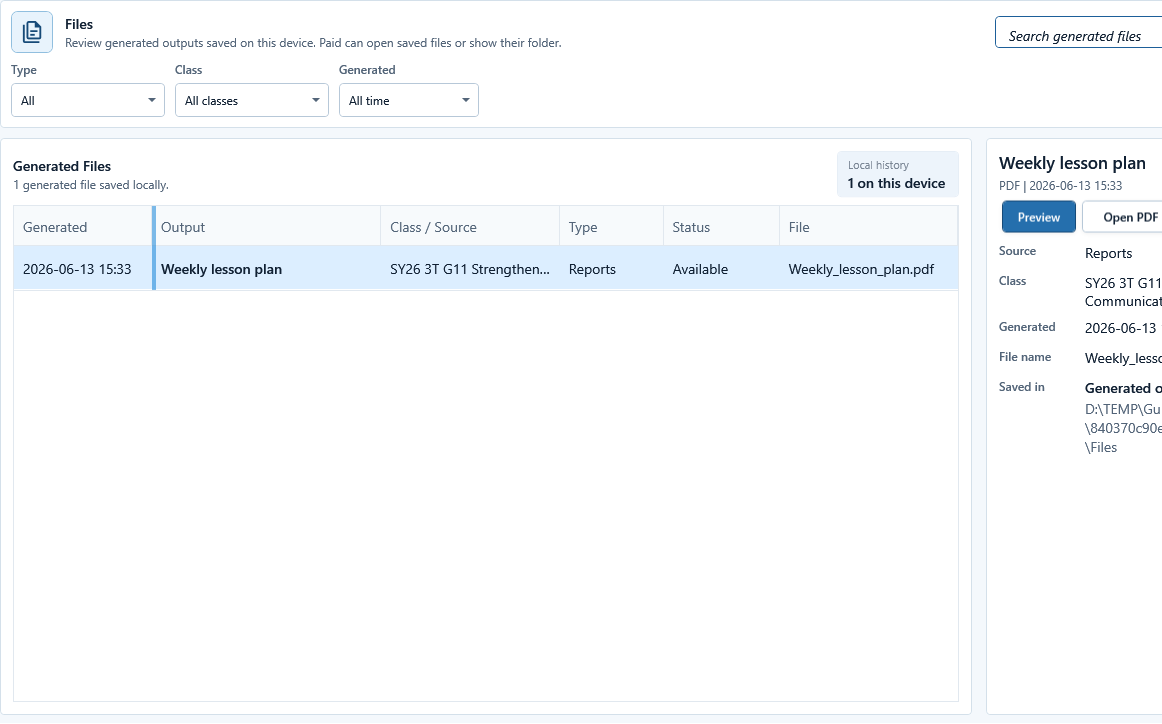 View full size
Sample data only. The detail pane distinguishes the intended file from similarly named outputs. Captured July 12, 2026. Step 3
Select the exact output and read its details
Select one row and verify its name, output type, source tool, class or subject context, created time, and local path. Similar filenames can represent different classes, terms, versions, or drafts.
Expected result: The detail pane distinguishes the intended file from similarly named outputs.
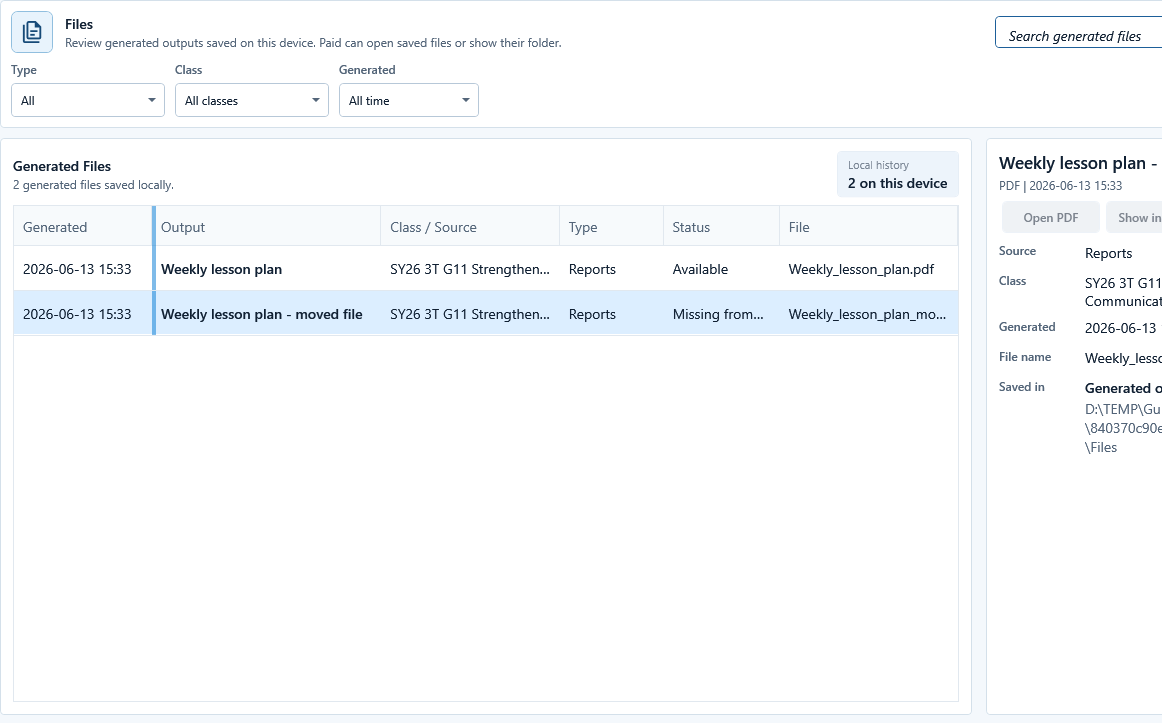 View full size
Sample data only. The health state explains why the history row exists but the actual file cannot be opened. Captured July 12, 2026. Step 4
Resolve a file that is missing from disk
If the selected row says Missing from disk, do not keep retrying Open or Preview. Check the displayed filename and saved location, use the source tool to regenerate when appropriate, or restore the file from a trusted backup; the local history row can remain after an external move or deletion.
Expected result: The health state explains why the history row exists but the actual file cannot be opened.
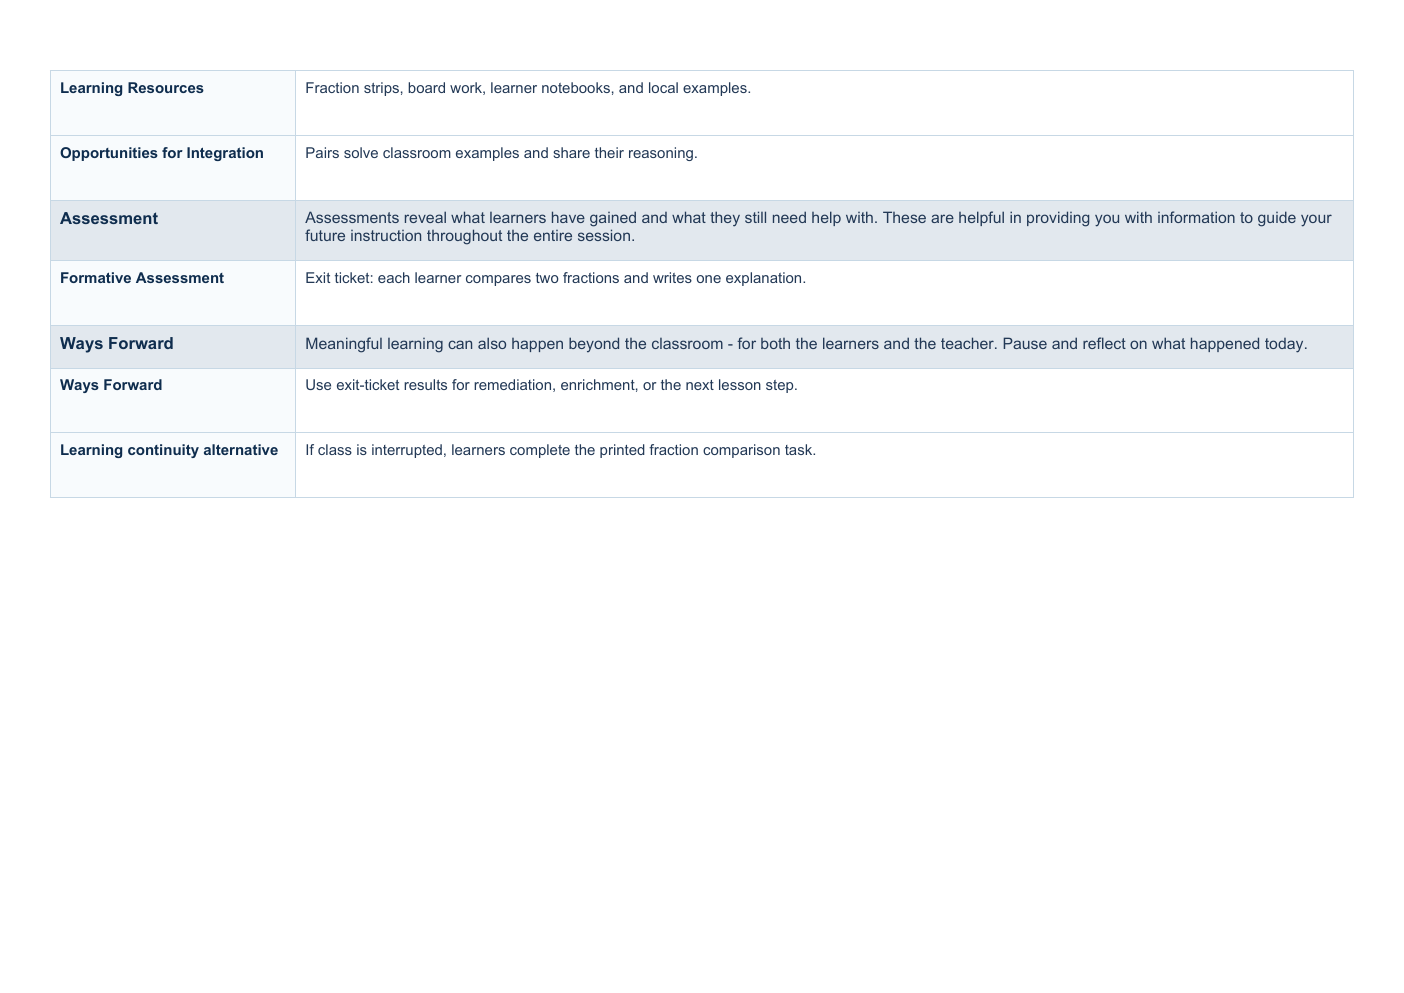 View full size
Sample data only. Opening the actual file reveals page flow and formatting that the Files row alone cannot prove. Captured July 11, 2026. Step 5
Inspect content and formatting before use
Review every PDF page, Word page, spreadsheet sheet, slide, image, or packet member that will be used. Check learner and class identity, dates, official-readiness labels, page breaks, formulas, answer leakage, and clipping.
Expected result: Opening the actual file reveals page flow and formatting that the Files row alone cannot prove.
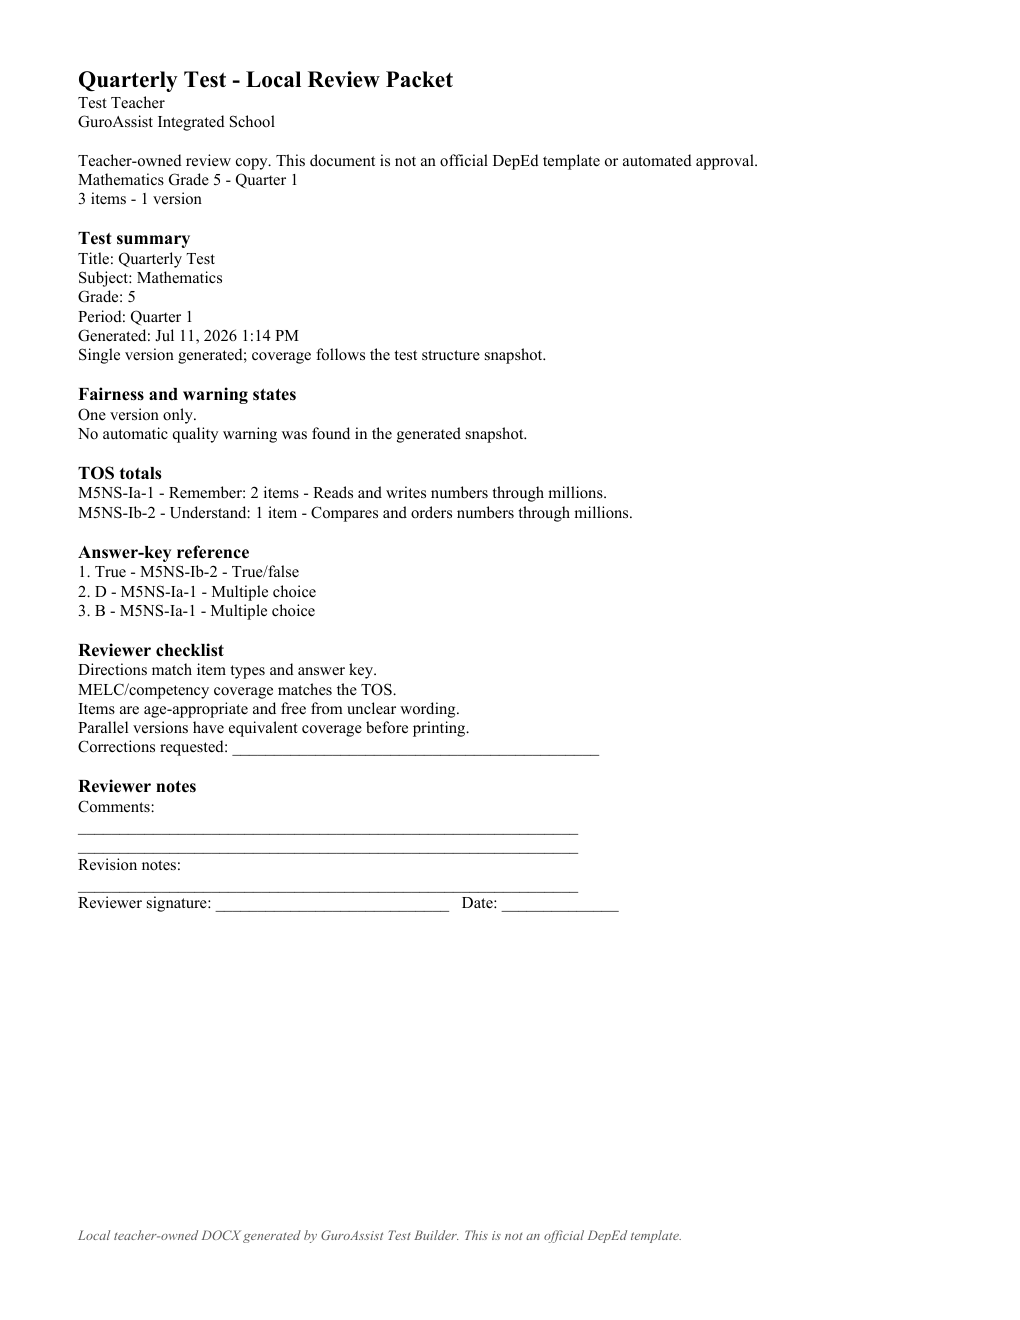 View full size
Sample data only. Packet review includes every included document before the teacher returns to the source tool to correct it. Captured July 11, 2026. Step 6
Inspect packet members and regenerate from the source
For a bundle or packet, open every member rather than checking only the first file. If identity, layout, content, or answer separation is wrong, return to the source named in Files, correct the source, and generate a new output; do not rename an incorrect file to make it appear current.
Expected result: Packet review includes every included document before the teacher returns to the source tool to correct it.


Review
Check these before relying on the work
These checks cover saved, previewed, generated, and teacher-review states.
Correct output selected
The chosen file should match the class, source, type, and date the teacher expects.
Readiness label is honest
Check whether the output is local, draft, final, official-ready, or blocked before relying on it.
Actual file is opened
Do not rely only on the row details. Open the file and review its contents before classroom or school use.
Local folder is known
The saved folder should be on a device or drive the teacher controls.
Backup is current
Back up important generated files before moving laptops, cleanup work, or reinstalling GuroAssist.
File status
Understand what each output label means
The label describes readiness inside GuroAssist; it does not create outside approval.
- Local
- Saved on this device for teacher use.
- Draft
- Still needs teacher review or editing.
- Final
- The teacher marked the local work final after review.
- Official-ready
- GuroAssist readiness checks passed; this is not DepEd approval or submission.
- Review-only
- Useful for checking, but not an official-ready output.
- Blocked
- Stop and resolve the displayed readiness issue first.
Blocked states and recovery
Fix the blocker before continuing
Use the direct recovery action when GuroAssist is waiting for setup, data, access, policy, or file readiness.
No generated files yet
Generate or save a supported output before Files can show a history row.
After recovery: The blocker is no longer shown, and the intended next action is available for teacher review.
Review generated-file helpFile was moved or deleted
If the saved file is missing, use the folder details and backups before generating again.
After recovery: The backup or restore summary shows the intended local workspace and a clear success or recovery state.
Open backup and restore helpOutput is blocked
Complete missing class, learner, template, grade, or readiness details before relying on official-looking output.
After recovery: The intended class appears in the workspace header and the task uses that class.
Review roster helpOpen action is unavailable
Some generated-file actions may need Paid access or an available local app for that file type.
After recovery: Paid access and any required credits are shown as available for this action.
Open activation help
Safety note
Files workspace is local output history. Generated files stay on the teacher's device unless the teacher chooses to share them, and teachers should open the actual file before using it.
Finish
Verify the result
Do not treat a saved screen or generated filename as proof that the work is ready.
You’re done when
Selecting a generated file reveals its local status, format, file name, and the available Open or Show in folder actions.
Guide details
Guide verification
Use these details to confirm that this guide matches the GuroAssist version and school year you are using.
- Verification
- Verified with GuroAssist 1.0.0.0
- Last reviewed
- July 11, 2026
- Screenshots
- Captured July 12, 2026
- Applies to
- 2026–2027
Was this helpful?
Choose an answer or report a guide that needs attention. No class, learner, or free-text data is sent by these buttons.
Related guides