
Step-by-step guide
Create Diagrams
Diagrams helps teachers create editable local visuals from starter layouts, then review clean exports or printed copies separately.
Teacher goal
How do I make teaching visuals without losing the editable source?
Use this guide when this is the task in front of you. Stop if the selected class, learner, role, school year, file, or output does not match.
In-app path
- Diagram
Get ready
Check the starting point
These are the minimum conditions for the workflow to make sense.
Before you start
Estimated time: About 5–10 minutes
- A clear classroom visual goal
- The editable source or notes you want to keep
- A local folder with enough space for the reviewed export
You should see
The saved diagram and its reviewed export show readable labels, spacing, alignment, and classroom-ready sizing.
Steps
Complete the task in order
Review choice points, save or preview behavior, and any stop condition before continuing.
 View full size
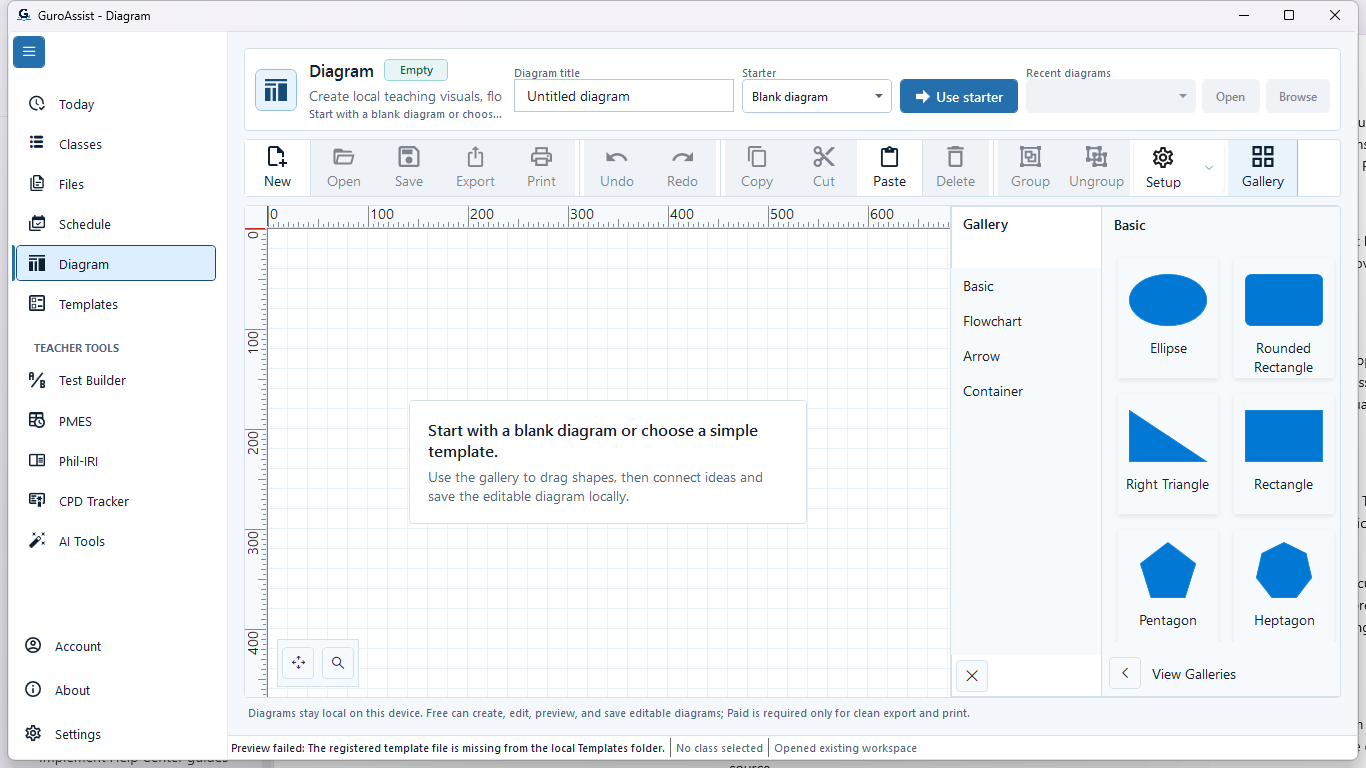
Sample data only. Start in the Diagrams workspace and confirm the title and blank canvas. Captured July 11, 2026. Step 1
Open Diagrams and name the local diagram
Choose Diagrams in the main navigation. Confirm the diagram title and canvas before adding content; the title is the name GuroAssist uses when the draft is saved or exported.
Expected result: Start in the Diagrams workspace and confirm the title and blank canvas.
 View full size
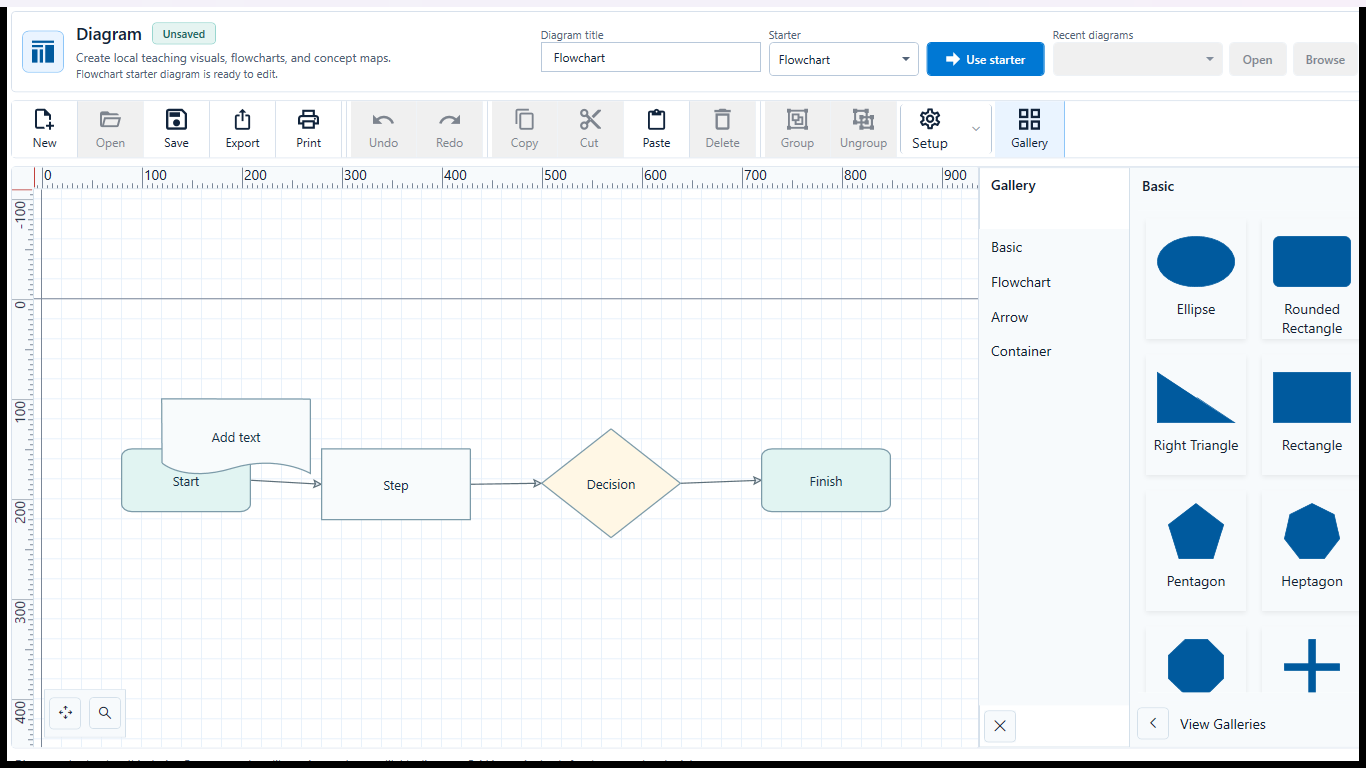
Sample data only. The pictured canvas keeps the relationship, labels, and editing controls visible together. Captured July 12, 2026. Step 2
Add shapes, labels, and connectors
Use the shape tools to add the needed nodes, select each node to enter a short learner-readable label, then use a connector tool to show the relationship. Keep labels brief enough to remain legible on the canvas.
Expected result: The pictured canvas keeps the relationship, labels, and editing controls visible together.
 View full size
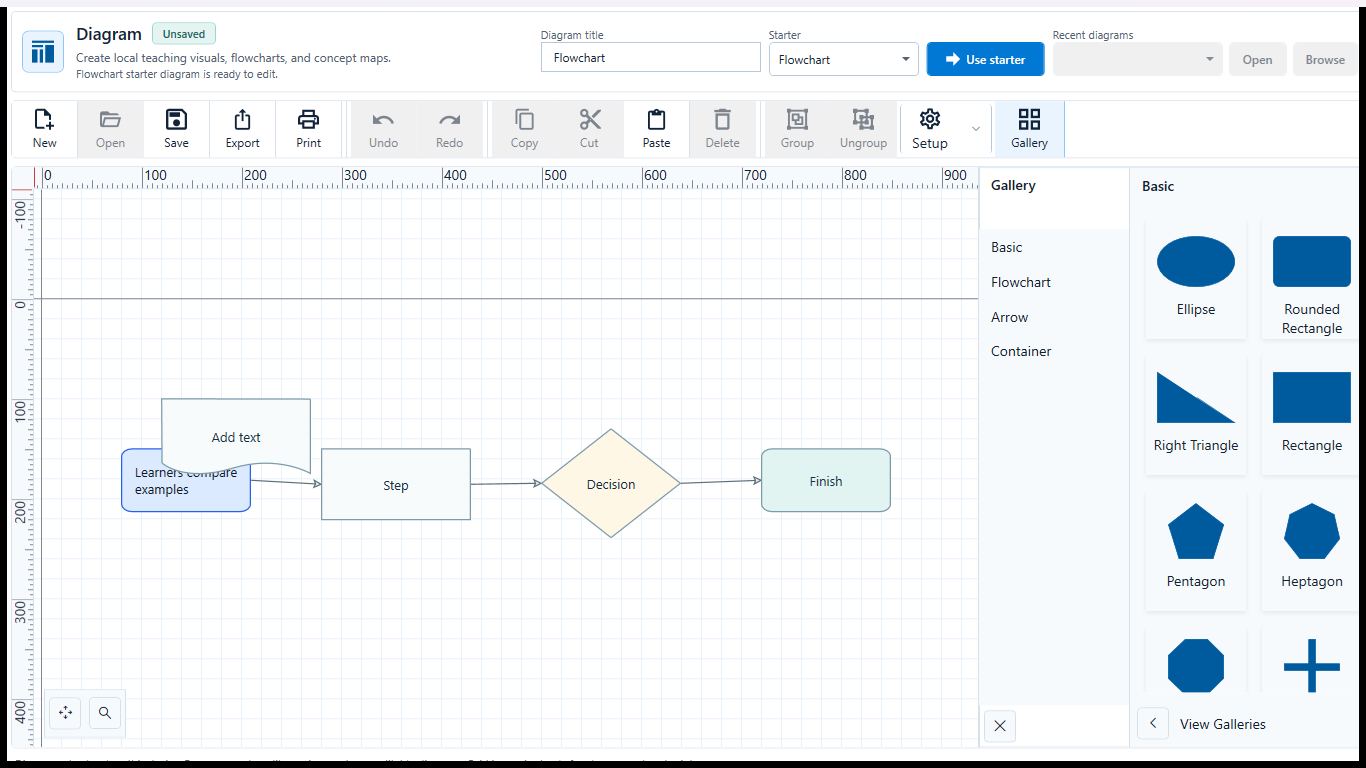
Sample data only. The selected-object state keeps the edited label readable and connector direction visible. Captured July 12, 2026. Step 3
Edit the selected object and review contrast
Select a shape or connector before changing its label, color, or position. Check that text remains readable against the fill and that connector direction is unambiguous; dark mode is a useful contrast check but does not replace inspecting the exported file.
Expected result: The selected-object state keeps the edited label readable and connector direction visible.
 View full size
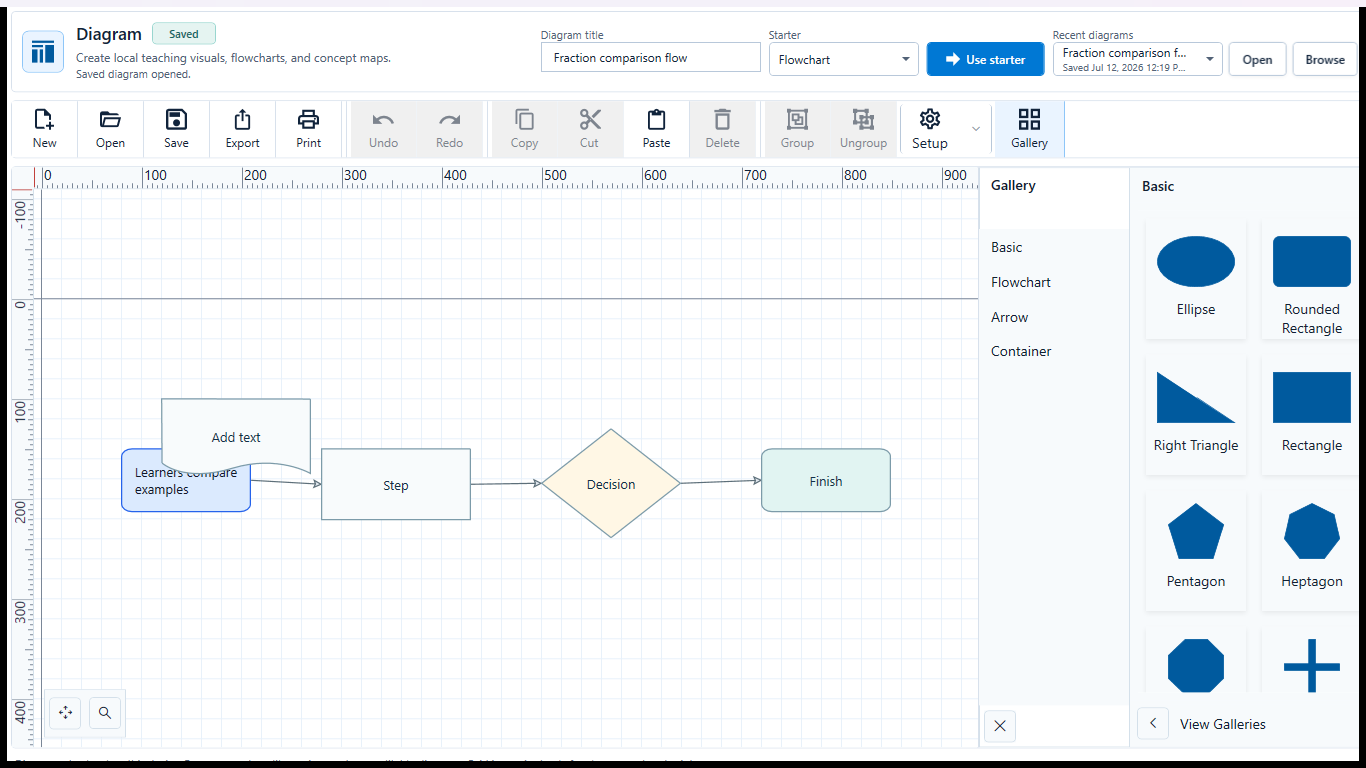
Sample data only. The reopened Saved state shows that the editable local canvas survived the round trip. Captured July 12, 2026. Step 4
Save locally, reopen, and verify the draft
Choose the local save action, leave Diagrams, then reopen the saved diagram. Confirm the title, labels, objects, connectors, and positions survived the round trip before exporting.
A saved draft is local work, not an official or final classroom file. Expected result: The reopened Saved state shows that the editable local canvas survived the round trip.
 View full size
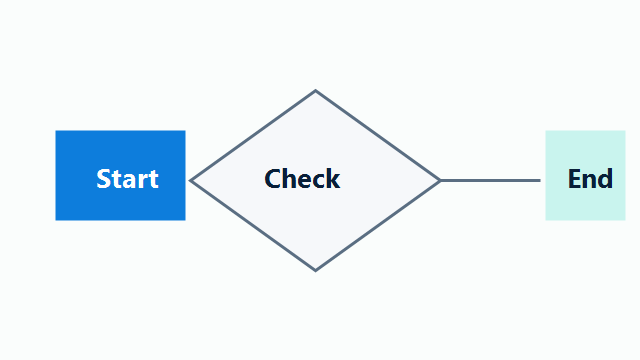
Sample data only. The actual opened PNG preserves the reviewed labels, shapes, connectors, page edges, and background. Captured July 12, 2026. Step 5
Export PNG or PDF and inspect the actual file
Choose the required PNG or PDF export, wait for the saved confirmation, then open the file from Files or its local folder. Check every label, connector, page edge, and background before printing, presenting, or sharing it.
If text is clipped, a connector is missing, or the background reduces readability, return to Diagrams and export again. Expected result: The actual opened PNG preserves the reviewed labels, shapes, connectors, page edges, and background.


Review
Check these before relying on the work
These checks cover saved, previewed, generated, and teacher-review states.
Editable source is saved
Keep the local diagram source separate from clean exports or printed copies.
Labels are readable
Check that shapes, arrows, and text are clear at the size learners will see.
Export is reviewed
Open or preview the clean export before printing, sharing, or using it in class.
Local files are organized
Use clear names so the teacher can find the diagram source and exported file later.
Blocked states and recovery
Fix the blocker before continuing
Use the direct recovery action when GuroAssist is waiting for setup, data, access, policy, or file readiness.
No diagram selected
Choose a starter layout or saved local diagram before editing.
After recovery: The blocker is no longer shown, and the intended next action is available for teacher review.
Troubleshoot this blockerUnsaved source changes
Save the editable source before relying on the exported or printed copy.
After recovery: The blocker is no longer shown, and the intended next action is available for teacher review.
Troubleshoot this blockerExport not ready
Clean export or printing can stay blocked when the file name, destination, Paid access, or required details are missing.
After recovery: Paid access and any required credits are shown as available for this action.
Open activation help
Safety note
Diagrams are local teaching materials. The editable source is the teacher's working file; clean exports and printed copies should be reviewed before classroom use.
Finish
Verify the result
Do not treat a saved screen or generated filename as proof that the work is ready.
You’re done when
The saved diagram and its reviewed export show readable labels, spacing, alignment, and classroom-ready sizing.
Guide details
Guide verification
Use these details to confirm that this guide matches the GuroAssist version and school year you are using.
- Verification
- Verified with GuroAssist 1.0.0.0
- Last reviewed
- July 11, 2026
- Screenshots
- Captured July 11, 2026
- Applies to
- 2026–2027
Was this helpful?
Choose an answer or report a guide that needs attention. No class, learner, or free-text data is sent by these buttons.
Related guides